A cache is one of the best techniques to improve backend speed and the application’s performance. With Redis caching backend, we store the frequently stored data in the memory by which when a user requests data, it can be easily given from the memory rather than making a trip to the database or the data source.
Redis is an in-memory data structure store used in the backend for caching the frequently used data application. It stores the data in the form of key-value pairing as the key represents the unique identifier through which that particular data can be accessed, However In value we can store strings, hashes, lists, sets, and more
In this article, we will start with the details and code for using the Redis tutorial in Node.js
Why Should We Use Redis Caching?
Caching with Redis provides an extremely fast speed because it stores the data in the memory rather than on the disk which results in lower latency when retrieving data.
Redis is very scalable horizontally because we can align other instances to the cluster and make it suitable for large applications.
Redis allows you to store the data that you want without any limitation to specific data structures.
To start working with Redis, first download the Redis server from GitHub.

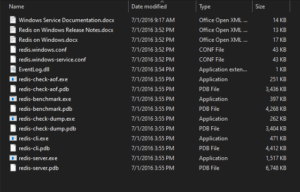
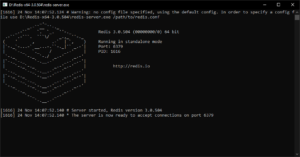
After downloading the Redis you will have a ZIP file that includes a redis-server.exe. Open the redis-server.exe, it will be running on port 6379. Now you have successfully started the Redis server which will be responsible for keeping the data in your memory for a certain period.

Below is the implementation of the Redis in Node.js
const express = require('express');
const redis = require('redis');


const app = express();
const port = 3000;


// Create Redis client
const client = redis.createClient({
  host: 'localhost',
  port: 6379,
});


client.on('connect', () => {
  console.log('Connected to Redis');
});


client.on('error', (err) => {
  console.error('Redis error:', err);
});


// Ensure the client is not prematurely closed
app.use((req, res, next) => {
  if (!client.isOpen) {
    console.log('Reconnecting Redis client...');
    client.connect().catch((err) => console.error('Error reconnecting Redis:', err));
  }
  next();
});


// Middleware to fetch data with caching
app.get('/data/:id', async (req, res) => {
  const { id } = req.params;


  // Check Redis for cached data
  try {
    const cachedData = await client.get(`data:${id}`);
    if (cachedData) {
      console.log('Cache hit');
      return res.json(JSON.parse(cachedData));
    }


    console.log('Cache miss');
    const data = { id, name: `User ${id}`, info: `Data for user ${id}` };


    // Cache the data for 1 hour
    await client.setEx(`data:${id}`, 3600, JSON.stringify(data));


    return res.json(data);
  } catch (err) {
    console.error('Error interacting with Redis:', err);
    return res.status(500).json({ error: 'Internal Server Error' });
  }
});


// Gracefully close Redis client on app termination
process.on('SIGINT', async () => {
  console.log('Closing Redis client...');
  await client.quit();
  process.exit(0);
});


app.listen(port, () => {
  console.log(`Server running on http://localhost:${port}`);
});
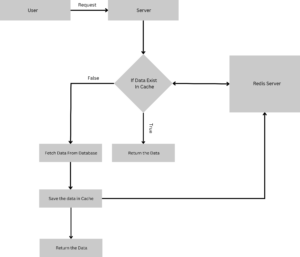
First, we will create a client which will be our configuration. When a request reaches our server we will check whether we have that data in our cache if the data exists then we will return the data. and also print a hit which will help us to deduce that the data is accessed from the cache memory rather than from the database.
When we don’t have the required data in the cache we will print a miss on the console which will represent that we don’t have that particular data in our memory then will fetch the data from the database or the data sources and then when we receive the data we will save it to the cache with an expiry time of an hour so that the data gets automatically removed from the memory when no longer in use.

This diagram explains the complete request flow of the Caching with Redis server, when the data will be accessed, and how the data will be saved in the memory.
Last, using Redis for your application can be the best way to improve backend speed and application performance and reduce the latency for getting the data from the database. You can also read our articles on Node.js

